In this tutorial we will be making a 4 column blogger template based on a two column originally designed by Douglas Bowman so i recommend you create a new blog for this tutorial using the following template

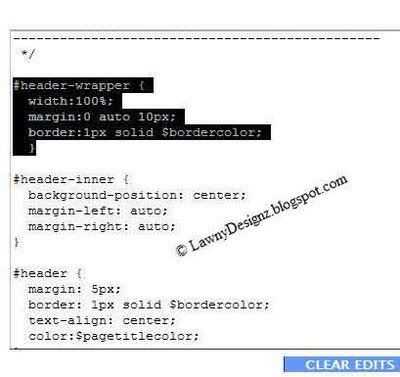
Now we have our template we need to find the header-wrapper CSS code and change the width from 660px to 100% or 990px like below
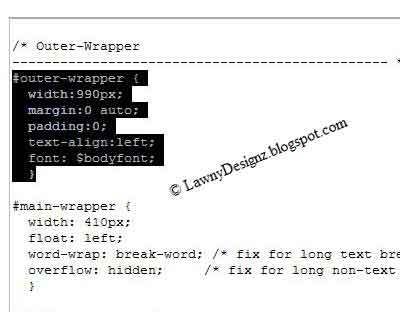
Now we have that done we need to look for the outer-wrapper code and change the width from 660px to 990px and the padding from 10px to 0 like ive done in the following screenshot
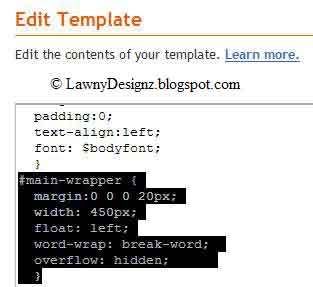
Now find the main-wrapper and change it from 410px to 450px unless you want your main post body to stay 410px wide also ive added a margin of 20px
Now im going to rename the sidebar-wrapper to left-column and change the width to 170px and the float to left because it is going to be a left column although you dont have to rename it but it helps see screenshot below

Now we have that done we need to change the XHTML code for the column so find the following XHTML code and change the name from sidebar-wrapper to left-column also move it above the main-wrapper see screenshot below (click the image for a larger view)

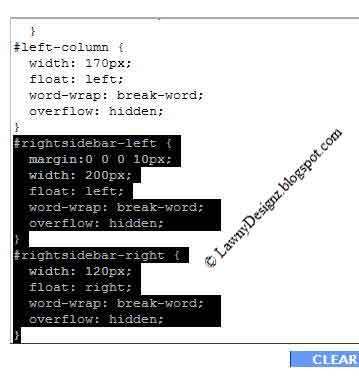
Now that is done we add the CSS code for our new columns so copy the following CSS code
and paste it just below the left-column CSS code like below
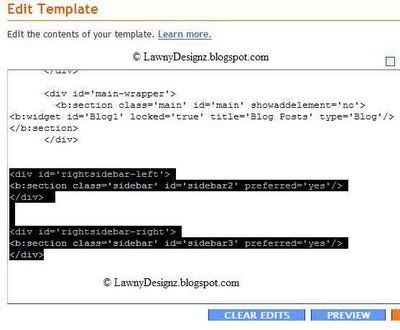
Now copy the following XHTML code
and paste it just after the main-wrapper like below
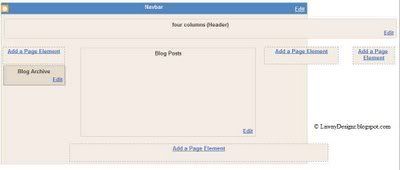
Save your template if you followed this tutorial right your page elements should look like below 4 columns althought if you preview the template you will not see them until you put widgets in them.
Thanks to Lawny for this tutorial
Now we have our template we need to find the header-wrapper CSS code and change the width from 660px to 100% or 990px like below
Now we have that done we need to look for the outer-wrapper code and change the width from 660px to 990px and the padding from 10px to 0 like ive done in the following screenshot
Now find the main-wrapper and change it from 410px to 450px unless you want your main post body to stay 410px wide also ive added a margin of 20px
Now im going to rename the sidebar-wrapper to left-column and change the width to 170px and the float to left because it is going to be a left column although you dont have to rename it but it helps see screenshot below
Now we have that done we need to change the XHTML code for the column so find the following XHTML code and change the name from sidebar-wrapper to left-column also move it above the main-wrapper see screenshot below (click the image for a larger view)
Now that is done we add the CSS code for our new columns so copy the following CSS code
#rightsidebar-left {
margin:0 0 0 10px;
width: 200px;
float: left;
word-wrap: break-word;
overflow: hidden;
}


#rightsidebar-right {
width: 120px;
float: right;
word-wrap: break-word;
overflow: hidden;
}
and paste it just below the left-column CSS code like below
Now copy the following XHTML code
and paste it just after the main-wrapper like below
Save your template if you followed this tutorial right your page elements should look like below 4 columns althought if you preview the template you will not see them until you put widgets in them.
Thanks to Lawny for this tutorial


0 comments:
Post a Comment